Share (Publish) and Unshare Media to a Course
The media shown in your Library is either shared to a course (published) or not. Course-Shared content is media that has been put into at least one class in at least one course. Typically class captures are shared immediately after they are recorded. Unpublished content is only visible in your Library (and to Admins but that's a different article).
Instructors can ONLY share content they own. This means that ALL of the content discussed on this page resides in the Library, as shown in the below figure. Instructors who access the media details page of content they do not own (shared with them or via the Class List) can see where the item has been published but cannot change it. Sharing to a course/class can be done from the Library or from the Media Details page; both methods are described in the below procedure.
Click Library from the top menu.

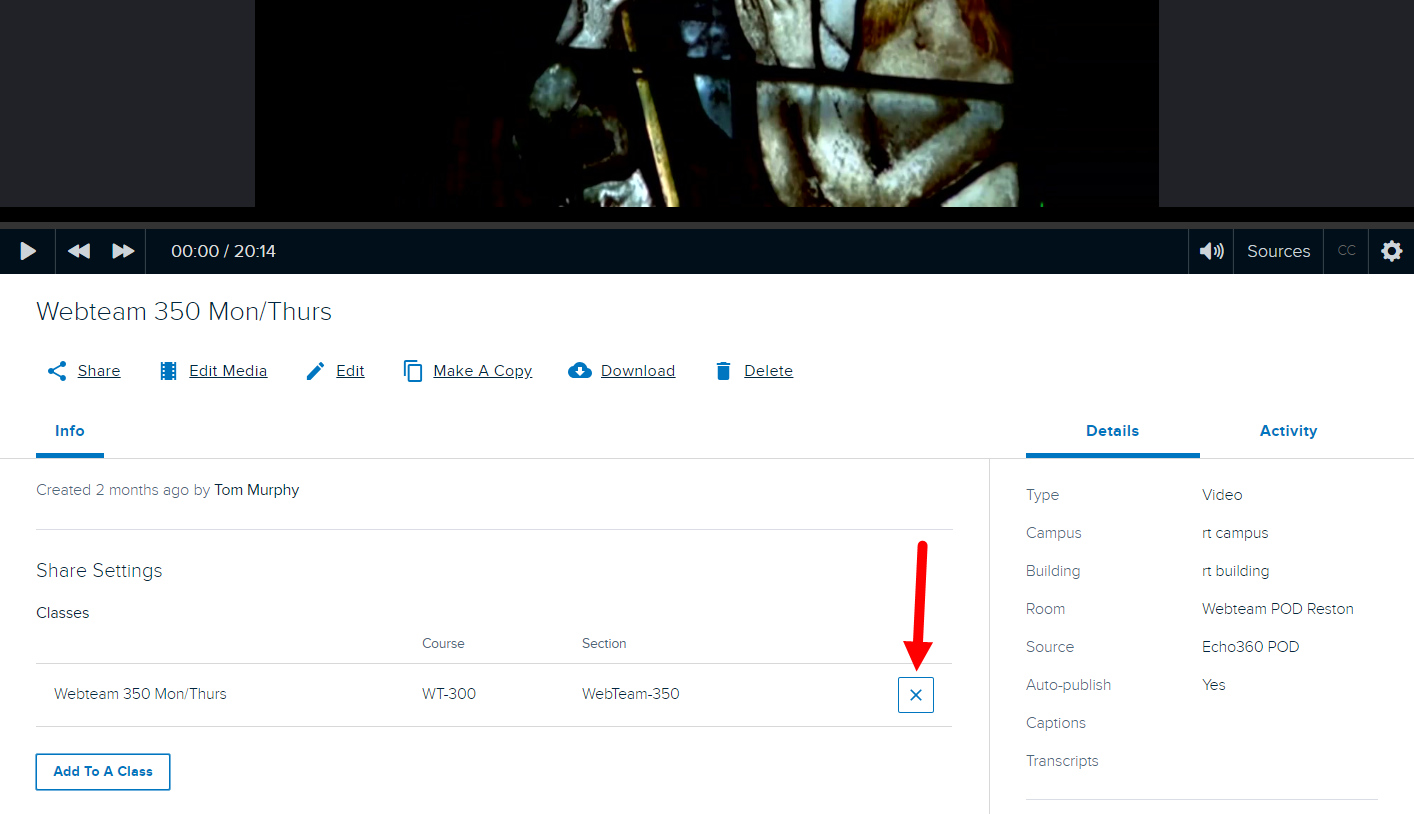
To see whether the item has been published (and where it was published) click a tile in the Library to open the media details page. Any courses to which the item has been published already appear at the top of the Share Settings area of the page, in the Classes section, as shown in the below figure.
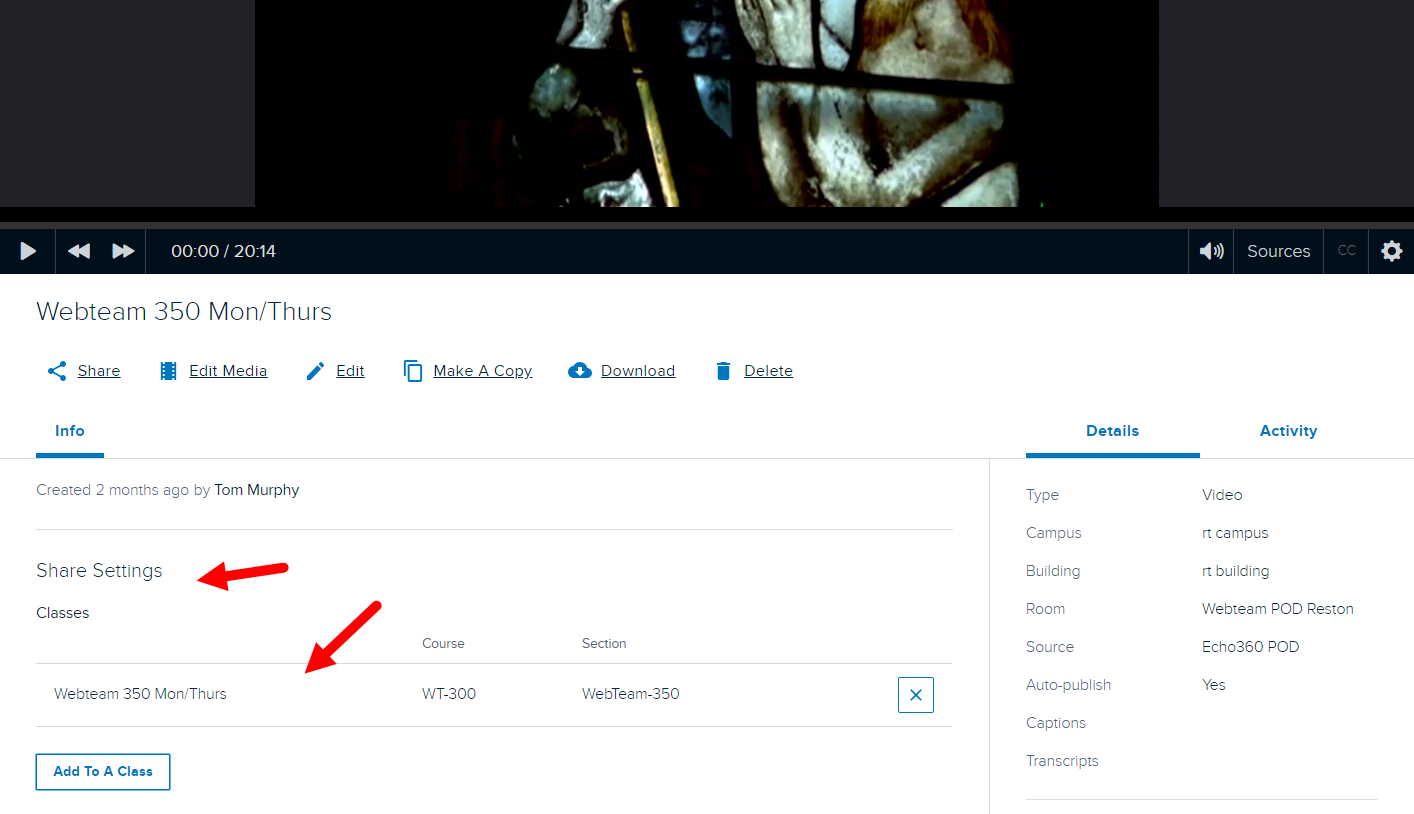
From here you can add the media to another class or course or remove/unpublish it as necessary.
ALTERNATELY, you can add media to a class from the Class List page for a course.
Sharing or Publishing Media to a Course
Publishing or sharing to a course is done through the Class Sharing modal, which can be accessed in different ways, as described below. The box itself and the fields in it function the same way regardless of how you access it.
To publish content to a course
1. There are a few ways to open the Share to a Class dialog box:
-
Click the Add To A Class button in the Media Details page, located below the list of any locations where this item may already be published.
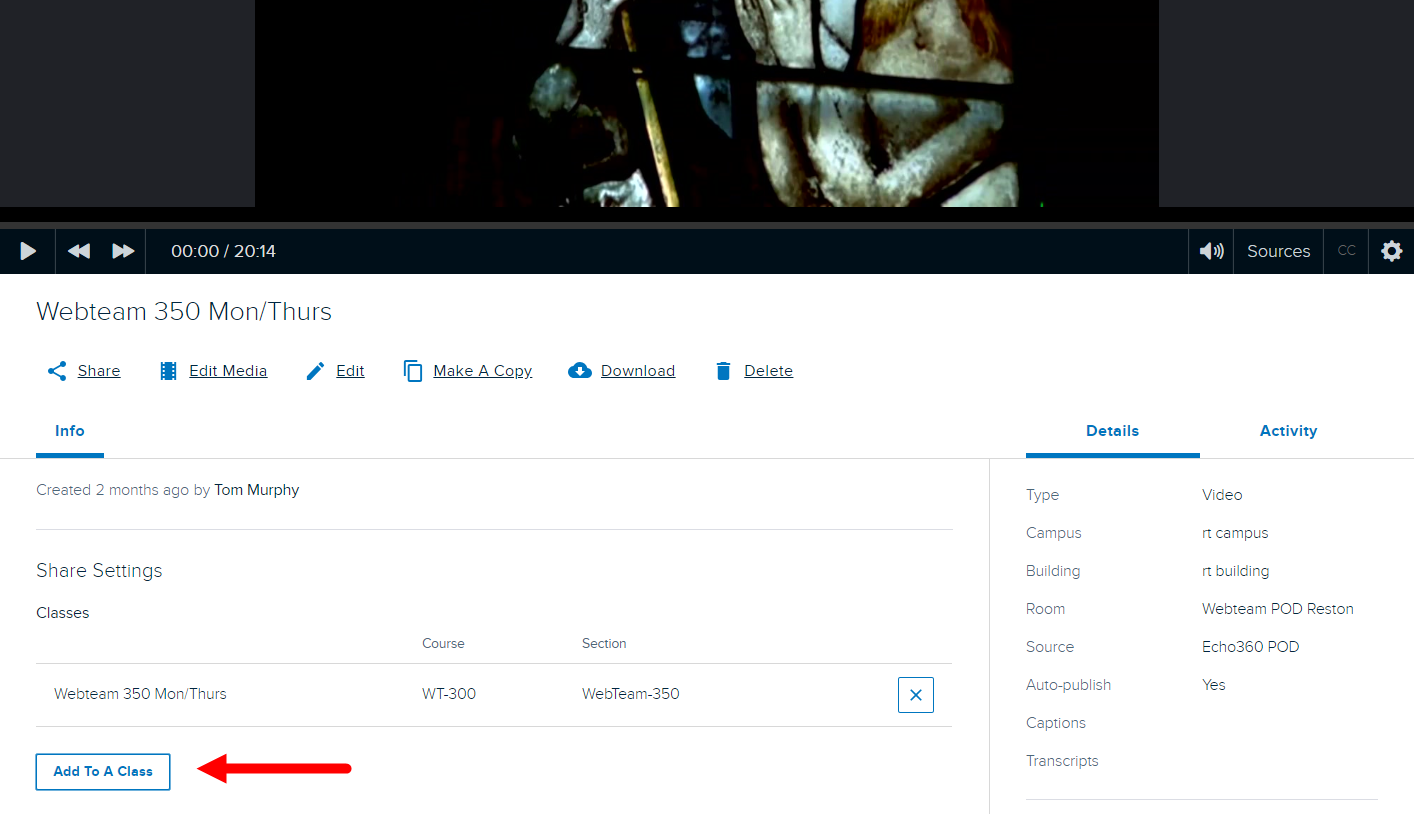
- The Class sharing window appears.
ALTERNATELY...FROM THE LIBRARY...
-
Click the menu button for a content tile and select Share
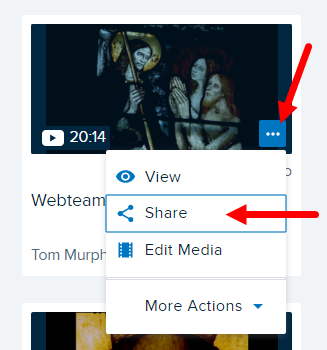
- Then click the Class tab.
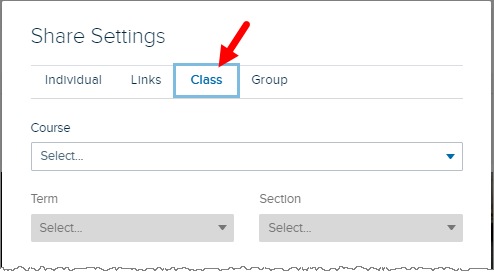
The Share Settings dialog box contains between one and four tabs, depending on what you have access to share media to. Everything else in the Class tab is identical and described below.
2. Use the course drop-down list at the top of the modal to select the course where you want to share this media.
3. Use the term and section drop-down lists (which become active after selecting a course) to select the term and section where you want to share the media.
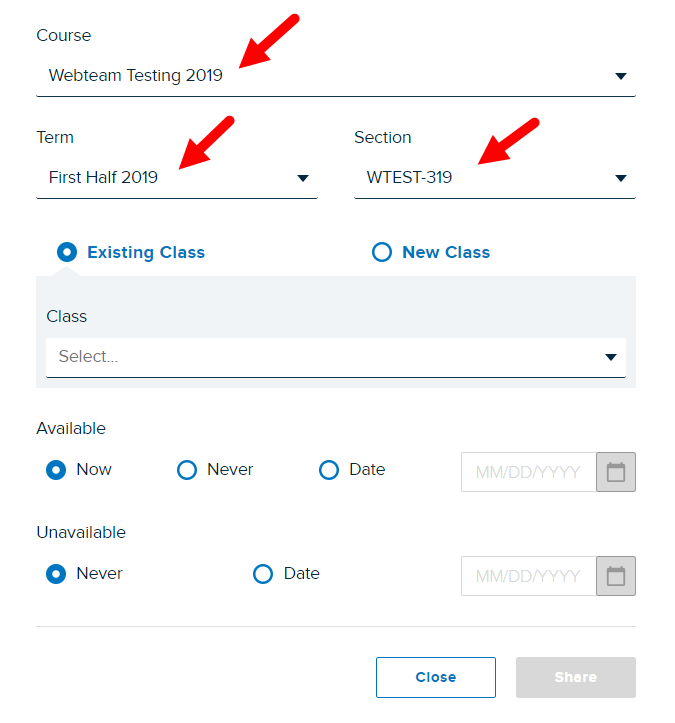
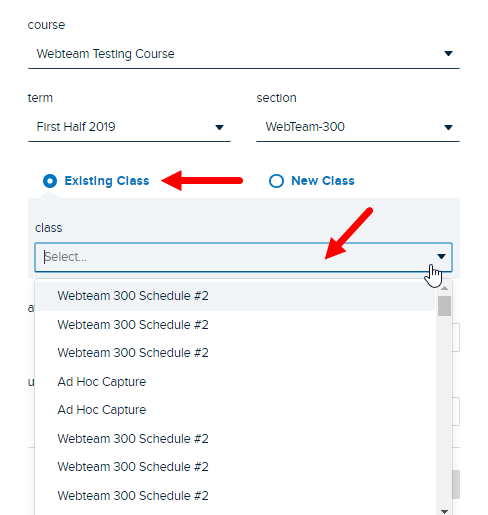
4. Select whether you want to share this media to an Existing Class or create a New Class to hold this media.
5. For an Existing Class, use the drop-down list to select which class to share the media to.
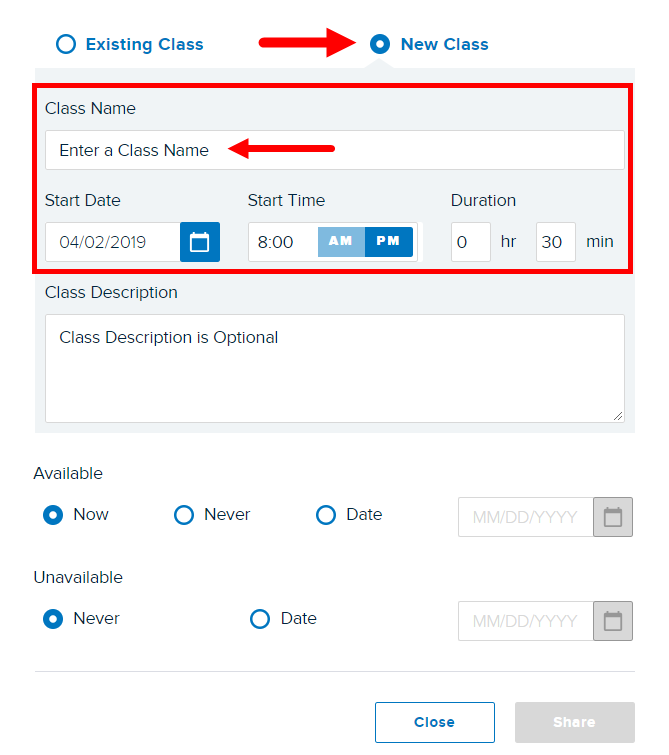
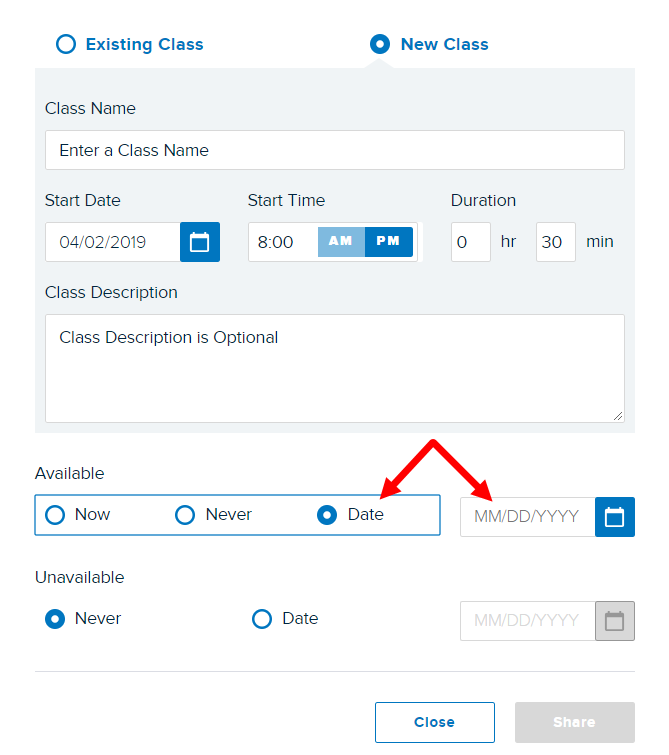
6. For a New Class, enter a Name and/or a Start Date and Start Time for the class, as well as a Duration.
If typing in the field, Start Date can be entered in mm-dd-yyyy format or in yyyy-mm-dd format, depending on your regional settings; Start Time can be entered in 12-hour using the AM/PM button.
NOTE: Classes must have either a Name or a Date/Time/Duration and typically have both, but only one or the other is required. A Description is optional.
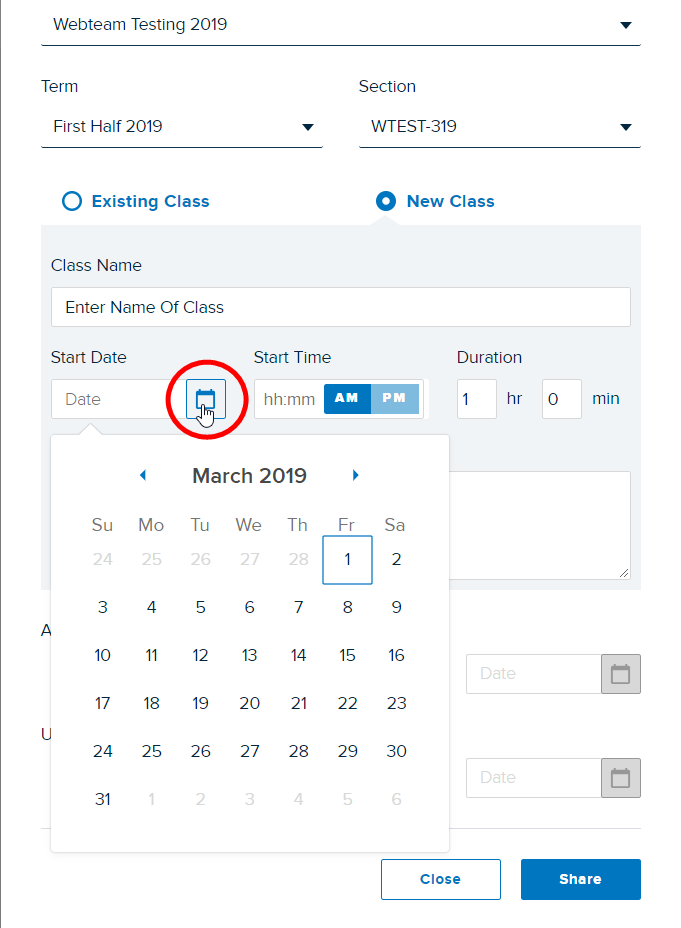
7. Click the Calendar icon to open the date-picker to populate the Start Date field if necessary.
8. If necessary, change the Availability settingsof the newly shared item. By default, the item will be available now (immediately) and unavailable never (available indefinitely). Leave this at the default or you can set availability as follows:
-
available now: Students can view the shared media as soon as you finish publishing it. This is the default
-
available never: The media is shared to the class but students cannot see it. This is the same as making availability manual (you must set the item to be available when you are ready).
-
available date: The media will be unavailable until midnight on the specified date, at which time students will be able to view the media.
-
unavailable never: The media is available to students and will continue to be unless this is changed. Along with 'available now', this is the default.
-
unavailable date: The media will become unavailable to students at midnight on the specified date.
9. If setting Date-based availability, selecting the Date option activates the date field and the calendar icon for using the date picker. You must enter a date if this option is selected.
10. When finished, scroll to the bottom of the Sharing modal and click Share.
NOTE: If the Share button is not active, review the fields in the modal and be sure you have completed all the necessary items.
11. Repeat the above steps to share to a different course.
The content now appears for the selected (or created) class on the Class List page for the course. If you created a new class to hold the content and the class has no date, your new class appears at the bottom of the class list by default. You can reorder the class list and change its location if necessary.
Unsharing or removing content from a course
Once shared to a course (published), media can be removed from any class(es) in which it resides. This is done from the Content Details page.
ALTERNATELY, you can remove media from a class via the Class List page for a course.
IMPORTANT: Unpublishing/Unsharing media from a class removes any student notes or bookmarks, as well as class Q&A and all student viewing analytics associated with the item. This information is not recoverable. If you want to retain this data but not allow students to view the media, consider making it unavailable instead.
To remove (unpublish/unshare) content from a class
1. Click on a content tile in your Library to open the Content Details page.
2. Scroll down to the Share Settings > Classes section of the Content Details page and click the X located to the right of the course/class you want to remove this media from as shown below.
3. Click OK on the Warning message that appears.
When finished, the media no longer appears in the class/course from which it was removed, though the class remains in the course.
Information Retrieved from: Share (Publish) and Unshare Media to a Course – Teaching & Learning (echo360.com)